Welcome to MesidaBamboo’s ultimate guide on how to repair and restring your wind chimes. At MesidaBamboo, established in 1999, we pride ourselves on being a professional manufacturer of bamboo wind chimes. We’re more than just a brand – we’re a community of sustainability advocates, quality craftsmen, and bamboo enthusiasts.
Key Takeaways
| Question | Answer |
|---|---|
| How do I identify common issues with wind chimes? | Look for broken strings, weathered wood, and damaged tubes. |
| Remove old strings, prepare new strings, restring the wind chimes, and attach the clapper and sail. | Replacement strings, scissors, needle-nosed pliers, and optional decorative elements and protective coatings. |
| What are the steps for restringing wind chimes? | Replacement strings, scissors, needle-nosed pliers, and optional decorative elements, and protective coatings. |
| How can I maintain my wind chimes? | Regular cleaning, inspections, and replacing worn-out components. |
| What should I do after repairing wind chimes? | Test for proper sound quality, adjust for personal preference, and ensure free movement. |
Introduction
Wind chimes are more than just decorative items; they bring a sense of tranquility and melodic charm to any space. However, over time, they may require some tender loving care to maintain their beautiful sounds. This guide will walk you through the process of identifying common issues, gathering necessary materials, and repairing and restringing your wind chimes.
Identifying Common Issues
Before starting the repair process, it's important to identify what needs fixing. Common issues include:
- Broken Strings: Wind chime strings can fray or snap due to weather exposure.
- Weathered Wood: Wooden parts can become worn or damaged.
- Damaged Tubes: Metal or bamboo tubes can get dented or lose their finish.
Materials Needed
Gather the following materials to ensure a smooth repair process:
- Replacement Strings: Choose durable strings like nylon cord or fishing line.
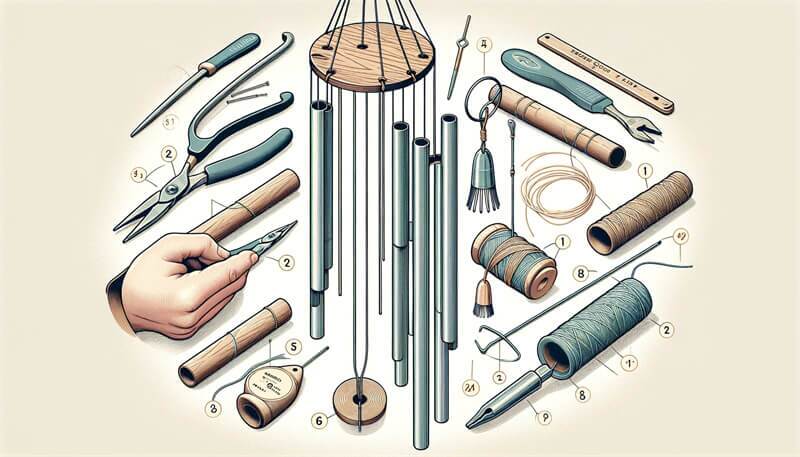
- Tools: Scissors and needle-nosed pliers are essential.
- Optional Items: Decorative elements, protective coatings, and replacement parts.
Step-by-Step Repair Process
Removing Old Strings
- Lay Out the Wind Chimes: Place your wind chimes on a flat surface.
- Cut and Remove Strings: Use scissors to cut any damaged strings and pull them out with pliers if necessary.
Preparing New Strings
- Measure and Cut: Cut new strings to the desired length, allowing extra length for adjustments.
- Use a Needle: Thread the new strings through an upholstery needle for easier handling.
Restringing the Wind Chimes
- Thread the Strings: Insert the new strings through the holes in the chime tubes and the top.
- Secure Knots: Tie secure knots at both ends to prevent slippage, but not too tight to restrict movement.
Attaching Clapper and Sail
- Attach Clapper: Ensure the clapper is securely fastened to strike the chimes properly.
- Add the Sail: Attach the sail to catch the wind and enhance sound production.
Maintenance Tips
Maintaining your wind chimes is crucial for longevity and optimal performance:
- Regular Cleaning: Remove dirt and debris with mild soap and water.
- Protective Coating: Apply a clear sealant to shield against weather damage.
- Routine Inspections: Check for signs of wear and tear and address them promptly.
Testing and Tweaking Your Wind Chimes
Once you’ve repaired and restrung your wind chimes, it’s crucial to test and fine-tune them to ensure they produce the desired sound and function optimally. Follow these steps to achieve the perfect harmony:
Ensuring Proper Sound Quality
- Hang the Wind Chimes: Place your wind chimes in a suitable location where they can catch the breeze. A porch or garden spot often works best.
- Listen for Clear Tones: Each tube should produce a clear and resonant tone when struck by the wind. If you notice any dull or muffled sounds, it may indicate a need for adjustments.
- Adjust String Lengths: If some tubes sound off, adjust the lengths of the strings to ensure they hang evenly and have enough room to swing freely.
Fine-Tuning for Personal Preference
- Tweak the Arrangement: Sometimes, a small adjustment in the arrangement of the tubes can make a significant difference. Experiment with different configurations to find the best sound.
- Add Dampening Materials: If the chime is too loud, consider adding dampening materials like felt or rubber washers at the points where the tubes connect.
- Customize the Sound: For a unique touch, try adding additional tubes or decorative elements that enhance both the look and sound of your wind chimes.
Ensuring Proper Movement
- Check for Obstructions: Ensure that the chimes can move freely without getting tangled or stuck.
- Secure Loose Parts: Tighten any loose components to prevent further damage and ensure the chimes operate smoothly.
- Balance the Weight: Make sure the chimes are balanced so that they hang straight and produce a harmonious sound when the wind blows.
Conclusion
Repairing and restringing wind chimes is a fulfilling and satisfying DIY project that allows you to restore a cherished item and enjoy its beautiful sounds once again. By taking the time to assess the damage, gather the necessary materials, and restring the chime, you’ll ensure a successful repair process.
Addressing additional maintenance or repair needs, such as refreshing weathered wood or replacing damaged components, will help prolong the lifespan of your wind chimes. Following these steps and making small adjustments as needed, you can easily fix a broken wind chime and maintain its optimal performance.
Remember, regular maintenance is key to keeping your wind chime in good condition. Regularly inspect and address any issues to prevent further damage and ensure your wind chime continues to bring joy for years to come.
For more in-depth guides and tips on caring for your wind chimes, explore our resources on maintaining and cleaning and crafting perfect wind chimes.
Discover our wide range of products and learn more about the art of wind chime crafting by visiting our website.
Thank you for choosing MesidaBamboo – your trusted partner in creating harmonious and enchanting wind chimes.


